Knowledge hub
Materialise Mimics
Sharpen your skills and develop leading-edge medical device designs, patient-specific implants, and personalized planning with Mimics, the platform that accelerates your journey to personalization at scale.
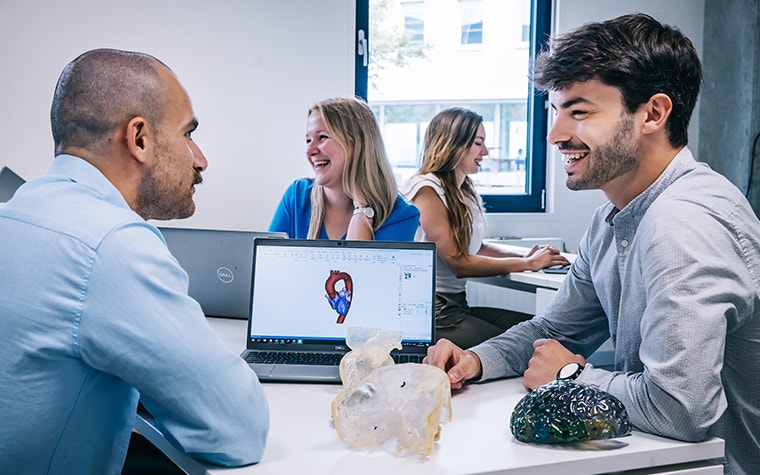
Mimics training courses
Join our flexible training sessions and learn to master Mimics with Materialise experts.
Gain the skills you need to perform image segmentation and design 3D anatomical models in healthcare environments like hospitals, medical device companies, and academia.
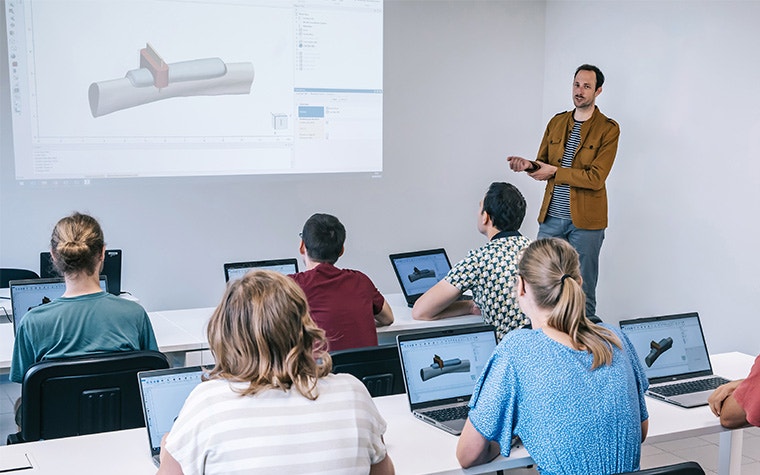
This certified course for Mimics users provides you with the expertise and skills to design medical guides and implants for 3D printing.

This masterclass will help you build a quality management system at your point of care that matches the additive manufacturing applications and regulations within your hospital’s existing framework.
Tutorials
Webinars
Frequently asked questions
Does Mimics run on a Linux platform?
Yes, it can — with some workarounds.
Mimics Core and 3-matic are Windows-based applications, but they can run on Linux using one of the following methods:
1. Windows OS Virtualization
You can run Mimics Core within a Windows virtual machine on your Linux system.
For example, the software has been successfully used on Fedora Linux (r2.6.22.14-72, Fedora 6) using VirtualBox 1.6.0_30421_fedora7_1, with negligible performance loss.
Simply start VirtualBox, install Windows, and then install and activate your Mimics license inside that environment.
2. WinAPI Emulation
Running Mimics Core via Wine (Windows API emulation) on distributions such as Ubuntu has not yet been officially tested. If successful, this method would allow smoother OS integration and eliminate the need for an additional Windows license.
Does Mimics run on a Mac?
No, unfortunately, it doesn’t. You can run Windows virtually on your Mac to use Mimics Core and 3-matic. Note that the software might not run optimally this way.
What are the recommended system requirements for Mimics Core?
Software
- Windows® 11 22H2
- Microsoft Edge® or equivalent
- Microsoft Edge® WebView2 (If Mimics Flow is used)
- PDF viewer
- .NET Framework 4.8 (or higher)
Hardware
- Third generation Intel® Core™ i7 or equivalent
- 16 GB RAM
- DirectX® 12.0 compliant AMD Radeon/NVIDIA® GeForce® card with 2 GB RAM
- 20 GB free hard disk space
- Resolution of 1920 x 1080 or higher
*Other qualifications may apply.
**When working with datasets larger than 1 GB, the system should comply with the recommended system requirements. Advanced segmentation tools such as Smart Expand and Coronary segmentation require hardware as specified in the recommended requirements, even for smaller datasets. When working with 4D or multi-stack data, the amount of RAM needed increases as you import more image series into the project. To use Mimics Viewer service for auto segmentation or case sharing, a minimum internet connection speed of 2Mbps is required. When using CT Heart automatic segmentation, the CPU must be compatible with AVX2 (Advanced Vector Extensions).
Supported operating systems
The following operating system versions were used to test Materialise Mimics Medical 27.0:
- Windows 10 Pro/Enterprise version 1909, 2004, 20H2
- Windows Server 2019 Standard version 10.0 RDP
- Windows 11 Enterprise version 22H2
DICOM Conformance
End-User License Agreement
What are the recommended system requirements for 3-matic Medical?
Software
- Windows® 11 22H2
- Microsoft Edge® or equivalent
- PDF viewer
- .NET Framework 4.8 (or higher)
- Microsoft Edge® WebView2 (if using Mimics Flow)
Hardware
- Third generation Intel® Core™ i7 or equivalent
- 16 GB RAM
- DirectX® 12.0 compliant AMD Radeon/NVIDIA® GeForce® card with 2 GB RAM
- 20 GB free hard disk space
- Resolution of 1920 x 1080 or higher
*It is recommended to use our software within a hardware and/or network environment in which cyber security controls have been implemented, including anti-virus and the use of a firewall. It is also recommended not to leave the workstation on which 3-matic Medical is running unattended and to ensure the workstation is password-protected.
**Additional, optional input devices: 3-matic Medical supports the use of the SpaceMouse by 3D Connexion. Please visit the manufacturer's website for the latest supported driver version of your specific model.
Supported operating systems
The following operating system versions were used to test Materialise Mimics Medical 27.0:
- Windows 10 Pro/Enterprise version 1909, 2004, 20H2.
- Windows Server 2019 Standard version 10.0 RDP
- Windows 11 Enterprise version 22H2
DICOM Conformance
End-User License Agreement
What are the system requirements for Mimics Flow?
You’ll find the instructions for use and system requirements for Mimics Flow in this document.
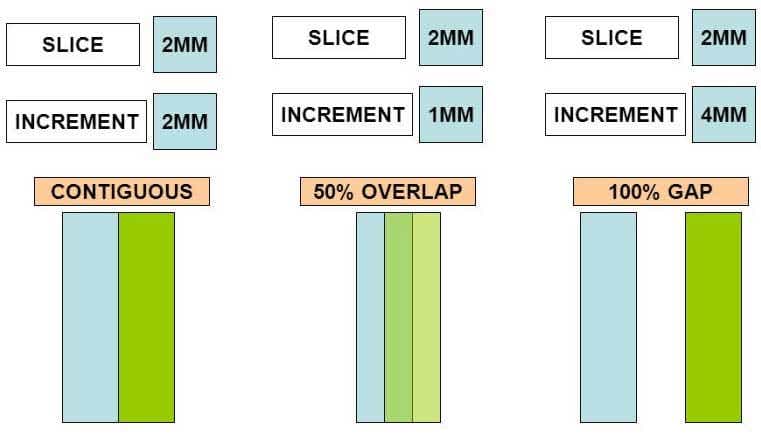
What's the difference between slice thickness and slice increment?
Slice thickness and slice increment are central concepts that surround CT/MRI imaging. Slice thickness refers to the (often axial) resolution of the scan (2 mm in the illustration below). Slice increment refers to the movement of the table/scanner for scanning the next slice (varying from 1 mm to 4 mm in the illustration).
It is acceptable and common to have an overlap in these values. The slice thickness is an important factor in understanding the resolution of your images. If the scan has a slice increment greater than the slice thickness, there is no information about the skipped section, so anatomical information or objects might not show up on the scan.
Click on ‘Image’ > ‘Organize Images’ to see the slice increment of each slice (0.625 mm in the example shown here). The slice increment is important as Mimics Core uses this for calibrating the project to ensure all measurements are correctly performed. Slice thickness is displayed in Project Information as copied from the DICOM headers. Both slice thickness and slice increment play a role in performing a 3D (gray value) interpolation in Calculate 3D.
What is the difference between a pixel and a voxel?
The reconstructed output from a scanner (CT/MR) is a stack of images. These images consist of pixels. Every pixel has certain dimensions (XY, where mostly X=Y) and a certain gray value that is related to the material it represents. The images are a certain distance apart (Z). This distance gives the pixels a certain depth; a volume pixel is called a voxel. It has XYZ dimensions.
Why do I see pixels when I zoom in?
Pixels are the result of the scan resolution. To avoid it, you can choose to see interpolated images in the View menu. This will interpolate the pixels and result in a slightly blurred image. Changing it does not affect 3D accuracy.
Can I teach with this software?
Mimics can be a powerful aid in teaching. If you want to teach your students with our software, we have a student edition available, which has limited import functionality. You can learn more about Mimics for academia here.
Can I use this software for my academic research?
Yes, for academic institutes who do not need our software for clinical or commercial use, we have dedicated offers, giving you access to the platform at an academic rate.
What is the added value of software maintenance?
The Software Maintenance Plan (SMP) ensures you get all the benefits of your software and reduces the business risk in case of software or hardware issues. You’ll also gain access to local support from our experienced application engineers.
How can I download the latest version of my licensed Materialise software product?
All downloads can be found here.
How do I install my Materialise software product?
We recommend that you close all other applications before installing your Materialise software product. You must have administrative access to install the software.
How can I register my software?
To register and activate your software, you must first complete the installation. After installation, the Materialise License Wizard will automatically open. From there, select the appropriate option based on the type of license you have or wish to obtain.

How can I reactivate my software in case of an emergency?
Every license under maintenance includes the option to request an emergency key file. This key file is used when your software becomes deactivated unexpectedly and the normal reactivation process fails.
For Mimics version 27 and earlier
The emergency key temporarily reactivates your software for six days, allowing you to continue working while our support team assists you with a permanent reactivation. The number of emergency key files you can obtain is limited, depending on your maintenance package, so this option should only be used in urgent situations.
For Mimics version 27.1 and later
For newer versions, you can use the License Rehosting/License Transfer functionality available in the End User Portal.
This allows you to quickly transfer your licenses to a backup or emergency system without needing an emergency key file.
How long will my software remain activated?
For Mimics versions 27 and earlier
In standard cases, your software will remain active for 6 months, after which you will be required to reactivate your license. Your software will display a warning when your license is about to expire. In certain cases, the duration of the license might be shorter.
You can consult the expiration dates on our password website after logging in with your CCKey or voucher code.
For Mimics version 27.1 and later
In standard cases, your software license remains active for 12 months. After this period, you will need to reactivate or extend your license to continue using the software. The reactivation process requires an internet connection to connect with the license server.
Before your license expires, the software will display a warning notification to remind you to renew or reactivate your license in time.
How can I update my preferences?
In Mimics Core, you can find preferences under the ‘Help’ menu. In 3-matic, they can be found under the ‘Options & Help’ menu.
How can I change the autosave frequency for recovery files in Mimics Core and 3-matic?
In Mimics Core, open ‘Preferences’ from the ‘Help’ menu. Under the General tab, you can set both the Local Autosave Frequency and the Mimics Flow Autosave Frequency.
In 3-matic, open ‘Preferences’ from the ‘Options & Help’ menu. Under the General tab, you can adjust the Recovery File interval to define how often recovery files are saved.
What is the Project Management tab? And how can I enable it?
The Project Management tab in Mimics is the bar on the right side of the screen that contains lists of all the operations done on the dataset; it lists your masks, measurements, parts, STLs, etc.
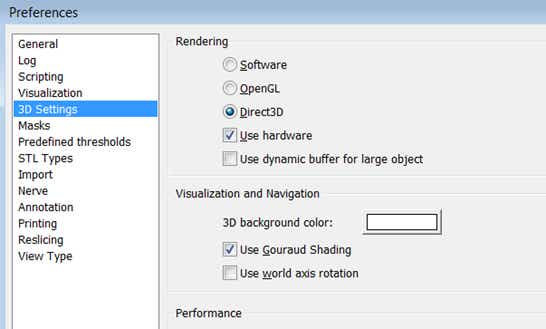
Can I change the background color of my 3D view?
In Mimics Core, open ‘Preferences' from the ‘Help’ menu. Under the Visualization tab, select 3D Views, and adjust the background color as desired.
In 3-matic, open ‘Preferences’ from the ‘Options & Help’ menu. In the tabs, navigate to Visualization → Viewport, and set the background color according to your preference.
What do the numbers in the axial view mean?
The bottom-left number in the axial view is the slice position according to the patient coordinate system (this information is read from the DICOM header upon import). The bottom-right number in all views is the slice position in Mimics Core. It starts at 0.00 and increases with the slice distance.
The slice distance in the sagittal and coronal views corresponds to the pixel size since these views are reconstructed by Mimics Core from the original axial data. The slice distance of the axial images can be checked under File > Organize Images.
My part rotates out of view in the 3D window; why is that?
When rotating a part in the 3D view, Mimics rotates around the virtual center of all visible parts. Here, the coordinate system also counts as a visible part. Furthermore, a part can be outside of your view but still be 'visible.' To rotate around just your part, make all other 3D parts invisible and turn off the coordinate system.
How can I edit my mask in 3D?
The 'Edit masks' tool allows you to edit your mask directly in the 3D view. To do so, you need to have 'Toggle mask 3D preview' turned on. This generates a 3D preview of your segmentation mask that you can work on (second button in the 3D section of the quick access panel next to the Viewport).

Note that in Mimics 18 and earlier versions, to edit masks in 3D, you have to use the 'Edit masks in 3D' function in the 'Segment' menu.
What are Hounsfield units (HU)?
Hounsfield units make up the grayscale in medical CT imaging. It is a scale from black to white of 4096 values (12 bit) and ranges from -1024 HU to 3071 HU (zero is also a value). It is defined by the following:
-1024 HU is black and represents air (in the lungs). 0 HU represents water (since we consist mostly of water, there is a large peak here). 3071 HU is white and represents the densest tissue in the human body, tooth enamel. All other tissues are somewhere within this scale; fat is around -100 HU, muscle around 100 HU, and bone spans from 200 HU (trabecular/spongeous bone) to about 2000 HU (cortical bone).
Metal implants typically have very high Hounsfield units. Therefore, they are attributed the maximum value in typical 12-bit CT scans (3071).
How do I change from Hounsfield units to gray values and back?
You can switch between Hounsfield units (HU) and gray values (GV) in the Preferences. Go to Help > Preferences > General; here you can choose between Hounsfield and gray values for the pixel unit.
Selecting Hounsfield will use a scale of -1024 to 3071. Selecting gray values will use a scale of 0 to 4096. Both scales are based on 4096 = 12-bit values (212).
Why are there no predefined thresholds for MR images?
MRI does not work with a fixed grayscale range like CT. Medical CT images typically consist of 8-bit (4096 values) Hounsfield units (HU), which is a predefined scale for gray values of tissues in a human body (see the item about Hounsfield units above). MR images can be 8-bit or 16-bit and the range of gray values depends on the MR machine (field strength, gradient, coil, etc.) and its settings (SE1, SE2, etc.). Therefore, every MR dataset has a different scale and we cannot provide predefined thresholds.
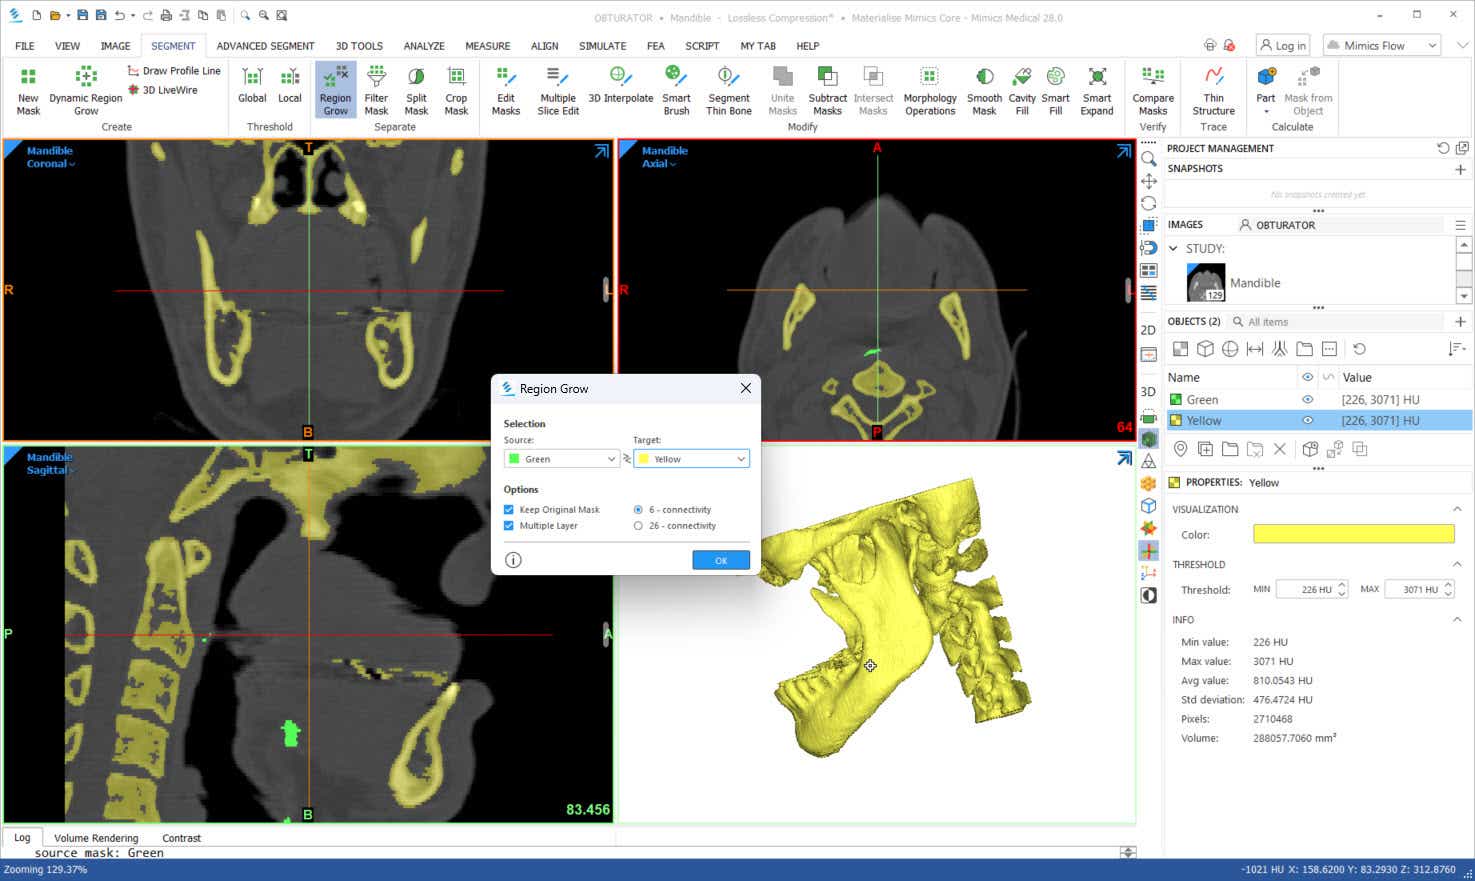
How do I get rid of the noise in my mask?
You can remove noise from your mask using the Region Grow tool. This tool allows you to isolate and retain only the spatially connected regions you wish to include.
After applying a Threshold, your mask may contain unwanted structures. To clean it up, select the Region Grow tool and click on the main area you want to keep (for example, the bone). All connected regions will be copied to the target mask, while any unconnected or extra fragments will be excluded automatically.
How can I register different image sequences?
On the image level, you can use the Image Registration tool in Mimics Core (Image menu). For this to work, both projects need to have the same units (mm, um, etc.). You can also use the various registration options in the Align menu to register a part onto the scan, onto a mask, or onto placed landmark points.
How do I avoid the pop-up dialog, 'The mask exists out of multiple parts. Continue?'?
Your mask consists of multiple unconnected parts. Use Region Growing (Ctrl + R) to select one region of interest before calculating a part.
Why do I get the notification 'Can't interpolate slices'?
This error usually pops up in the Multiple Slice Edit tool when you have edited in two neighboring slices. The algorithm needs at least one empty slice between two edited slices in order to interpolate.
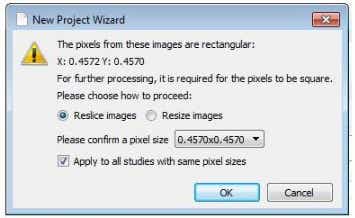
What should I do when my image has rectangular pixels?
You can use the Reslice Project tool in the Image menu. If you choose to reslice the images, the anatomical proportions will be preserved, but the dimensions and grey values of the dataset will be recalculated and interpolated. The quadratic interpolation will have a small blurring effect on the images.
What quality setting should I use to generate my 3D model?
The optimal quality setting will result in the most accurate model possible. It will also apply some optimization techniques — triangle reduction and smoothing. Whenever you create a 3D model, you can adjust these settings by clicking 'Options' in the 'Calculate 3D' window. However, calculating a complex 3D part in optimal quality can take some time, so in some cases, you would only want to use this setting on your final 3D model. If you just want to have a quick view of the 3D model, you could use lower-quality settings so it will calculate faster.
L-104191-01
Materialise medical device software may not be available in all markets because product availability is subject to the regulatory and/or medical practices in individual markets. In countries where no regulatory registration is obtained of Mimics and/or 3-matic Medical, a research version is available. Please contact your Materialise representative if you have questions about the availability of Materialise medical device software in your area.