EXPERT INSIGHT
5 Tips to Optimize Your Personalized Medical Device Design Workflow

When it comes to designing personalized medical devices such as hip implants, cranial plates, or surgical guides, the possibilities offered by 3D printing are virtually limitless. In practice, designing a personalized device is easier said than done. The design process behind it is often tedious, requiring a lot of time, attention to detail, and sometimes several iterations between the surgeon and the engineer to get it right. Therefore, there can be a lot of benefits from optimizing the design process. In this article, we’ll share several tips on how to do just that.
1. Start designing with the end in mind. If the end goal is to design a personalized device that accurately follows the contours of the anatomy, it makes sense to take the contours of the anatomy — e.g. a segmentation from Mimics Core — as the baseline and to start the design process directly on the 3D STL model. After all, working on this type of file, which is suitable for 3D printing, allows designers a degree of freedom that cannot be achieved with traditional manufacturing methods.
Unlike traditional production methods, such as machining, forging, or pressing, 3D printers do not take CAD files like IGES as input. Rather, they take STL files as input, which is a file format based on the triangulation of the surface. It, therefore, makes sense to use design software intended for creating designs optimized for each patient’s unique anatomy, as well as 3D printing.
If the design concept you are working on is an implant, an additional advantage of using 3D printing in combination with dedicated software like 3-matic is that porous structures can be designed right onto the implant. This way, there is no need for additional chemical or other unpredictable treatment processes to obtain a porous surface. And, by adding porous structures, you can improve the interaction with the surrounding tissues by enhancing bone ingrowth and mimicking native mechanical tissue properties1.
2. Automate as much of your workflow as possible through scripting design process steps. When designing a personalized device, it might seem counter-intuitive to automate a large part of that workflow. After all, the device is unique to each patient, right? Well, it turns out that usually the major characteristics of the design are similar between patients, or at least similar enough to be able to (semi-)automatically generate the personalized device.
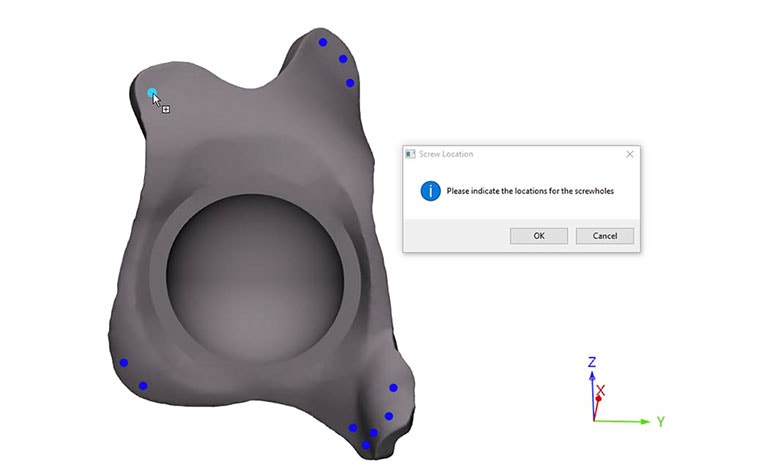
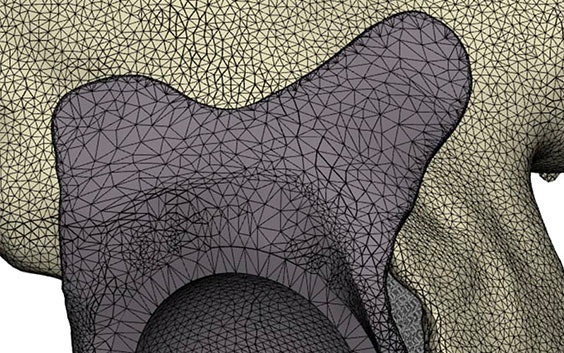
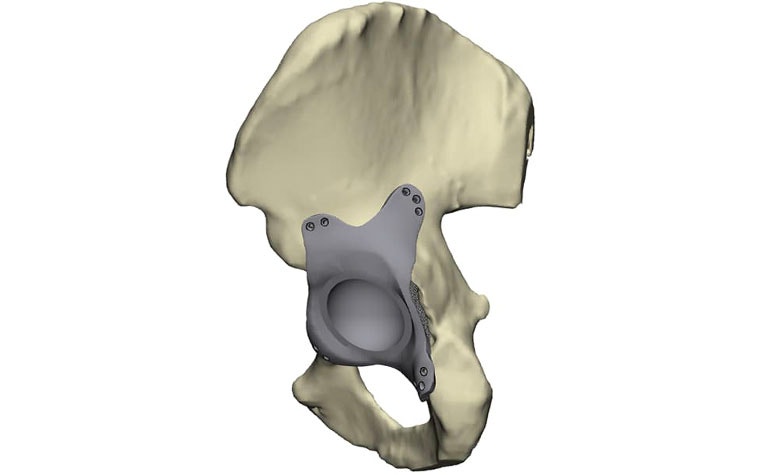
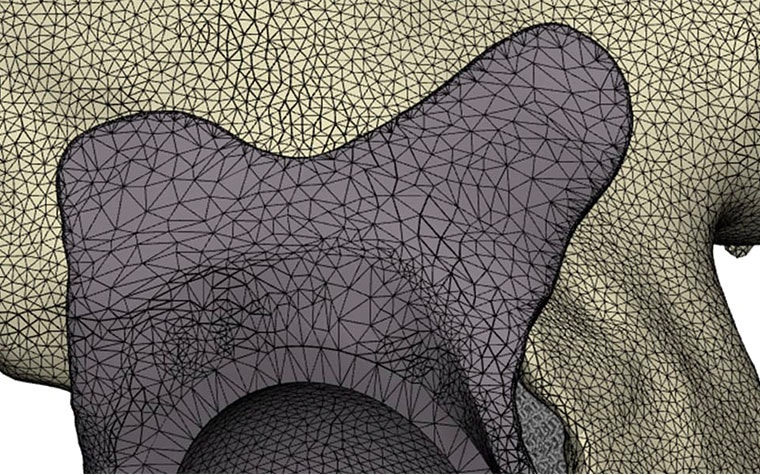
Let’s take a look at a simplified example. When designing a personalized hip implant for a patient with a severe acetabular defect, the shape of the pelvis, the desired position of the center of rotation, the size of the cup, the outline of the shape of the flanges, and a few landmarks are in principle enough to come up with a basic design. Using Python API functions in 3-matic, the flanges could be created, its edges could be rounded, and they could be connected to the cup through Boolean operations, all automatically. Likewise, the screw holes could be created based on landmarks indicating their positions, a template for the screw hole shape that gets positioned in each of the landmarks’ positions, and Boolean operations, again all automatically.
Not only can this save dozens of minutes of design time per case, but it can also improve the consistency within and between different team members’ designs, lead to fewer human errors, make it easier to train new employees, and reduce repetitive work.
3. Use the latest, most powerful tools. 3-matic contains several new and improved tools that can help to make your design process as fast and easy as possible. There are too many to mention in this blog post, so we will highlight a couple of examples.
Firstly, the Lattice module is scriptable to enable its use in an automated process. Moreover, it’s available in the Medical version of 3-matic. That means that you can now start and finish the personalized design process, from scan to segmentation to design of a porous implant, all using software that is certified for medical purposes.
Secondly, Python APIs for many of the existing functions have been added, like an API function to pause script execution and show a message box. While the message box is active, regular interaction with 3-matic Medical is possible, which can be useful, for example, when interactive translation or rotation is required. The script will continue to run after closing the message box.
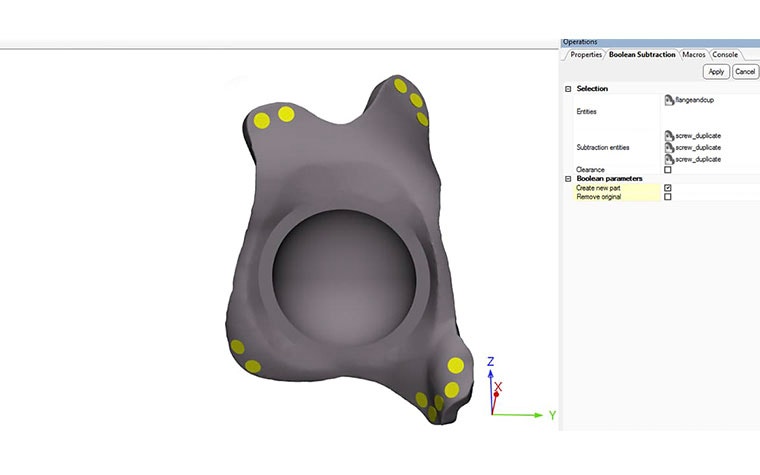
Thirdly, sometimes seemingly small improvements can have a large impact. For example, the Boolean Subtraction function now supports selecting multiple entities in one go. Hence, merging parts before doing the subtraction is no longer needed. These are just a few of the many features. For a more extensive overview, please refer to the release notes.
4. Get proper training. We cannot stress enough how much time you might be able to save on your project(s) with proper training for the type of work you do. Why not attend one of the Mimics training courses near you to learn best practices or reach out to your local application expert for dedicated support?
5. Avoid design iterations by involving surgeons in the critical decision points in your design process. Think of the design decisions that might have an impact on the surgical procedure, the patient outcome, or that simply depend on surgeon preferences. Make it as easy as possible for surgeons to give feedback during their already busy daily routines, and use language that they understand. Reviewing the 3D anatomical models and device designs (with overlay on the images) often works best. Using the Mimics Viewer, you can make those models available for a surgeon to review at their convenience, in an intuitive way, and on their preferred type of device. Good collaboration between engineer and surgeon is essential to get from an image to a well-performing device in time for surgery.
L-100662-02
Share on:
You might also like
Never miss a story like this. Get curated content delivered straight to your inbox.