EXPERT INSIGHT
5 Easy Ways to Remove Metal Support Structures

Support structures could be considered a “necessary evil” in the additive manufacturing (AM) process. The more support structures you use, the more material necessary and the higher the post-processing costs – as well as a lower surface quality. On the other hand, these support structures are absolutely necessary to anchor your part to the build platform (they prevent curling and reduce the risk of the part getting dislodged by the recoater), conduct heat (process stability) and prevent molten metal from sinking through the powder bed (for downfacing areas and avoiding dross formation).
Applying a minimal amount of support is a matter of taking into account your design and part orientation. When support structures are still required, advanced 3D printing software offers you a wide range of support types that are ideal for the geometry of your part.
Let’s have a look at 5 tips that make metal support removal easier and/or limit post-processing.
More information about the self-supporting angle in our metal webinar!
1. Angle your supports
For areas where supports are needed inside the part (such as horizontal holes along the X or Y axis), part-to-part support contact will occur. That usually means a surface twice as big to post-process, which is not always desirable.
However, it is not always necessary for support structures to touch the part twice. Using angled support structures, you can also connect the lower part of the support structure to the build platform to limit the affected surface quality. If you can’t avoid touching the part twice, you can guide the support to an area that can be post-processed more easily.

Extra tip: when defining your angled supports, keep in mind the self-supporting angle. Given support structures are not as strong as the part itself, they tend to have a lower self-supporting angle.
2. Use fine tooth structure
To ensure that your support structures are strong enough, but also easy to remove, combine strong supports with fine teeth. If you need a strong connection, we recommend that you let the teeth slightly penetrate the part, otherwise it might break off and cause a layer shift.
When not removed carefully, teeth can cause pits that damage the part, especially for sensitive features such as thin walls or lightweight structures. Therefore, another option is to go for predefined break-off points, which are shaped like an hourglass. These break off in the middle. You can then smoothen the surface to remove the rest.
3. Rescale the support structures
Support structure width doesn’t always need to be equally broad on the build platform as it is on the part. If no strong platform connection is required, you can scale it down to reduce the area that will need post-processing. When applying a negative rescaling factor, don’t forget to consider the self-supporting angle.
On the other hand, you can also perform a positive rescaling if you want to reinforce and add stability to your support structure, for example with tall and thin geometries.
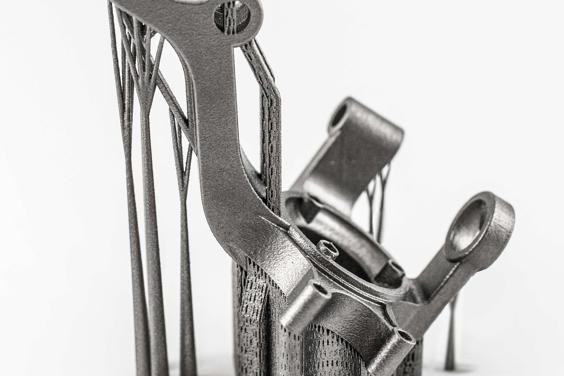
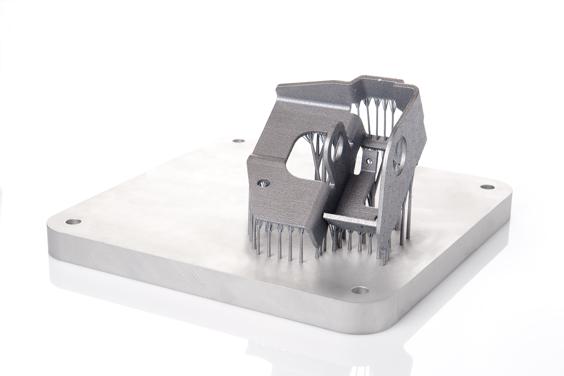
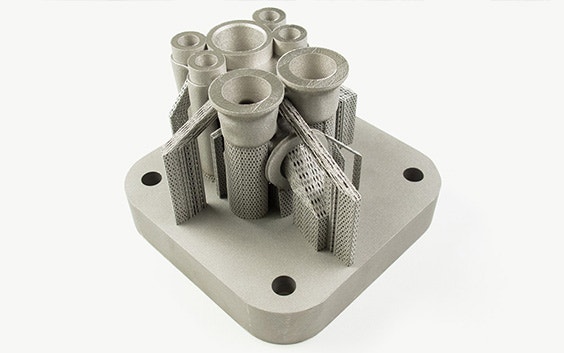
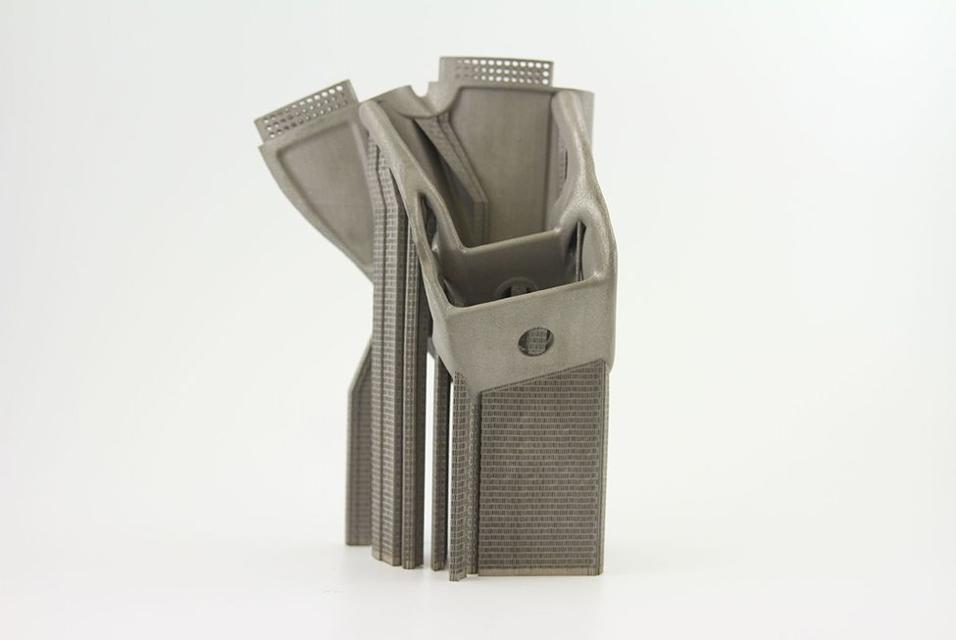
Metal 3D printed parts with support structures
4. Fragment block supports
Whereas volumetric support is completely solid, block support is composed of a grid of lines, with each line normally assuming the thickness of the melt pool. Fragmented block supports, or clearance between support structures facilitates support removal.
However, this must be done with the appropriate parameters: for example, if removing supports manually, make sure the width of the fragmentation channel is large enough to insert your tools. Also, only apply fragmentation when relevant: this is useless for thin projections of supported areas. Fragmented supports is also one of the topics of our metal webinar.
5. Milling off additional material
Finally, in certain cases, you can add additional material to the places that need support structures and mill it off to achieve the intended shape. This way the quality of the part is maintained and no additional post-processing steps are needed as the supported areas are milled/polished anyway. In addition, material can also be added to exterior surfaces, resulting in a clear staircase effect.
The amount of additional material depends on which material is processed, as well as the geometry of the specific surface, but in general the order of magnitude is around a few millimeters.
Extra: Automate metal support generation
There is another option that facilitates support removal. Materialise e-Stage for Metal software automatically generates support structures for metal components. These are so thin and easy to remove that you can reduce the time spent on metal support removal by 50%. In addition, it decreases data prep time by 90% and powder consumption by 20%. Learn more about it by attending our metal webinar.
Share on:
You might also like
Never miss a story like this. Get curated content delivered straight to your inbox.